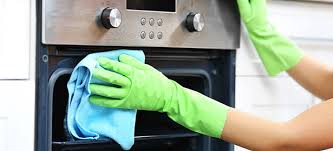
A Step-by-Step Guide on Oven Cleaning: Keep Your Oven Sparkling and Efficient
Maintaining a clean kitchen and ensuring optimal performance and energy efficiency both depend on keeping your oven clean. Over time, food spills, grease, and grime can build up, reducing the oven’s capacity to heat and possibly producing an unpleasant smell. We’ll give you a thorough, step-by-step tutorial on how to effectively clean your oven in this blog post. By following these easy instructions, you can prolong the life of your oven, restore its sparkle, and take pleasure in delicious meals prepared in a spotless appliance.
Step 1: Gather Supplies
Obtain all the required supplies before beginning the cleaning process. Rubber gloves, a cleaning cloth or sponge, a small brush with firm bristles, baking soda, vinegar, water, and a spray bottle are all required. To make the cleaning process simple and effective, make sure these supplies are available.
Step 2: Remove Oven Racks
Start by taking out the pizza stone, thermometer, and any other removable components from the oven. To remove any accumulated grease and grime, soak them in warm, soapy water. You can concentrate on cleaning the inside of the oven while the racks are soaking.
Step 3: Prepare a Natural Cleaning Solution
Using water and baking soda, create a paste. Without the use of harsh chemicals, baking soda is a gentle yet powerful natural cleaner that can help get rid of tough stains and odours. The paste should have a spreadable but not overly runny consistency.
Step 4: Apply the Cleaning Paste
Put on your rubber gloves and evenly distribute the baking soda paste throughout the oven’s interior surfaces, paying particular attention to the areas that have the most buildup. Avoid applying the paste to vents or heating elements as this can result in damage. Allow the paste to sit for several hours or over night so that the grease and grime can dissolve.
Step 5: Clean the Oven Racks
While the paste is working its magic, use a scrubbing sponge or cloth to clean the oven racks. Gently scrub away any remaining dirt, rinse thoroughly with water, and dry them before reinserting them back into the oven.
Step 6: Wipe Down the Oven Interior
When the baking soda paste has had time to work, clean the interior surfaces of the oven with a damp cloth or sponge. The grime should have been loosened by the baking soda paste, easier for users to remove. Use a small brush with firm bristles to gently scrub away any tough stains. Use a clean, damp cloth to wipe away any leftover baking soda residue after you have completely removed all of the residue.
Step 7: Clean the Oven Door
Remember to clean the oven door as well, as it frequently gathers greasy fingerprints and spills. In a spray bottle, combine equal parts water and vinegar to create a solution. Spray the mixture onto the glass surface, then use a cloth or sponge to wipe it clean. Allow the vinegar solution to sit for a few minutes before wiping away any particularly difficult stains.
Step 8: Final Touches
To finish the cleaning process, allow the oven to air out for a while to ensure any lingering odours dissipate. Reinsert the clean oven racks, thermometer, or other removable parts. Take a moment to admire your sparkling clean oven, ready to cook your next culinary masterpiece.
Keeping your oven clean on a regular basis is crucial for keeping your kitchen clean and efficient. You can effectively clean your oven without using harsh chemicals if you follow this step-by-step guide. Don’t forget to clean your oven frequently to avoid the accumulation of bad smells and tough stains. In addition to improving your cooking experience, a clean oven guarantees maximum energy efficiency, enabling you to save time and money over time. If you put some effort into maintaining your oven, you’ll benefit from a spotless and dependable appliance for many years to come.
Create the perfect grilled sandwich by reading our latest blog.

